
I’ve noticed that a lot of people continue to be confused over how exactly you select an army in
Warhammer 40,000 7th edition. The key confusion is over what constitutes Unbound or “not-Unbound,” aka
Battle-Forged. There’s also some confusion over Objective Secured and its role in all of this. If you
are one of those confused people, this primer in army selection is for you.
What is Unbound?
Let’s get the simple one out of the way first. Unbound simply means you take what you want in your army,
in any combination, from any faction. You still have to follow minimum squad sizes and the options for
models and squads as normal, but you aren’t bound by any selection process otherwise. You can include
formations in your Unbound army, and they get the special rules assigned to the formation, but you may
not take any other type of detachment.
What is Battle-Forged?
In a nutshell, Battle-Forged means that everything in your army is contained in a detachment. There’s no
limit on number of detachments, type of detachments, or factions (though remember the allies matrix for
how different factions interact on the battlefield). You must at least meet the minimums of each
detachment you take.
Now, here’s where things get interesting. The definition of detachment actually includes formations, and
some people might forget that when they consider building a Battle-Forged army. Formations are just a
special type of detachment.
Let’s review the kinds of detachment you might come across to date in Warhammer 40,000 7th edition.
1. Force Organization Chart Detachment
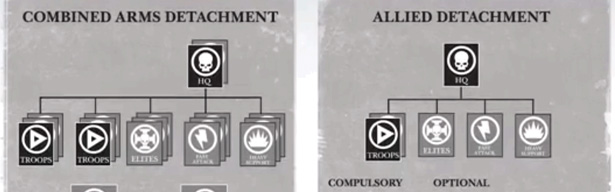
This category would include any kind of detachment that has a force organization chart that you fill out
with unit selections. Such formations include the basic Combined Arms Detachment and Allied Detachment
(Warhammer 40,000: The Rules), Ork Horde Detachment (Codex: Orks), Great Wolf Detachment (Company of the
Great Wolf), Realspace Raiders Detachment (Codex: Dark Eldar), or Skitarii Maniple (Codex: Skitarii).
Each of these detachments has a number of selections at each of a variety of slots (Troops, HQ, Fast
Attack, Elites, Heavy Support, Fortifications, Lords of War) that you may take, with a minimum for some
slots (for example, the Combined Arms Detachment requires 1 HQ and 2 Troops; the Ork Horde Detachment
requires 1 HQ and 3 Troops). Each detachment has a set of Command Benefits, special rules that apply to
the units in that detachment. This is where confusion over Objective Secured comes in. Objective
Secured is a Command Benefit for Combined Arms Detachments and Allied Detachments. As the “core”
detachments in the game, people tend to assume that any Battle-Forged army must have Objective Secured.
However, the majority of detachments have other Command Benefits, and it’s very possible to have a
Battle-Forged army with absolutely no units with Objective Secured. The trade-off is access to special
abilities like granting all of your units Scout and Crusader (Skitarii Maniple) or the potential to Deep
Strike units on a random die roll (Great Waaagh! Detachment).
Even if a faction has its own force organization chart detachment, or mega-detachment as I’ll touch on in
a moment, you can use Combined Arms Detachments and Allied Detachments with that faction.
2. Mega-Detachments
Another kind of detachment is what I like to call mega-detachments. (Also, Epic 28mm detachments, in
reference to how much they resemble forces in Epic 40K, Games Workshop’s out-of-production 6mm scale game
of massive battles in the Warhammer 40,000 universe.) These detachments are typically made up of a
series of formations, with a structure that involves a cCore formation and a selection of support
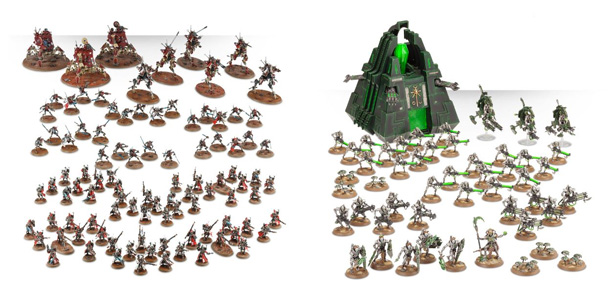
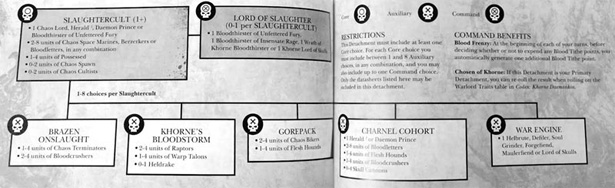
formations (split between Auxiliary formations and Command formations). Examples include the Necron
Decurion Detachment (Codex: Necrons), Blood Host Detachment (Codex: Khorne Daemonkin), and Craftworld
Warhost (Codex: Craftworlds).
These detachments have their own Command Benefit, which you get from selection the minimum number of Core
and Auxiliary formations. As most of the formations are actual formations also listed within their
source material, the models in those formations also gain their formation special rule.
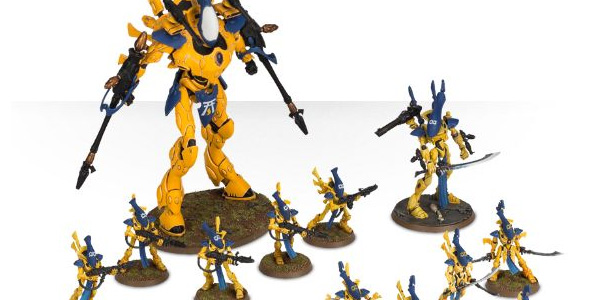
For example, in a Craftworld Warhost, you can select a Core choice of a Guardian Battlehost, with an
optional Command choice of a Seer Council, and Auxiliary choices of an Aspect Host, a Wraith Host, and an
Engine of Vaul. As the Engines of Vaul are not a formation listed in the book, there’s no further
benefit to those units other than the Command Benefit for the Warhost (which doesn’t help vehicles much).
However, the other formations not only gain the Command Benefit, but also the special rules associated
with their formation. The Guardian Battlehost will have access to free heavy weapon platforms and the
“Vaul’s Might” special rule. The Aspect Host will gain +1 BS or WS and rerolls of failed Morale,
Pinning, and Fear tests. The Wraith Host will gain Battle Focus (remember that the Command Benefit for
the detachment boosts that rule) and the “Guided Wraithsight” rule. The Seer Council will have access to
multiple extra benefits.
You have to fulfill certain minimums for each formation in the detachment, and there are maximums as
well. This makes these detachments a bit harder to field in smaller games.
3. Formations
The final type of detachment is formations. Even though you can have a detachment primarily made up of
formations (see the mega-detachments above), formations are their own style of detachment.
Each formation has a selection of specific units you may take. Most of the time there will be a set
number of each type of unit in the formation, but sometimes there will be a minimum and maximum, allowing
you some flexibility.
Formations have no Command Benefits. Instead, they simply have special rules that apply to all of the
units within the formation.
There are several examples of formations, as every codex (and pretty much every campaign supplement, and
even some issues of White Dwarf) since Warhammer 40,000 7th edition came out has had at least one
formation in it.
Combining Detachments
As I mentioned above, in a Battle-Forged army you may take any combination of detachments, so long as all
of your models (units, vehicles, characters, etc.) are in a detachment of some sort.
Let’s look at some examples, ranging from tame to wild:
Imperial Crusade: Combined Arms Detachment (Space Marines), Skitarii Maniple (Skitarii), Skyreaper Lance
formation (Imperial Knights)
Word Bearers: Combined Arms Detachment (Chaos Space Marines), Combined Arms Detachment (Chaos Daemons)
Double-Council Eldar: Craftworld Warhost including Seer Council (Eldar), Seer Council formation (Eldar)
Swift Astartes Assault: Wolf Guard Strike Force formation (Space Wolves), Dante’s Avenging Host formation
(Blood Angels)
Chaos Knights: Combined Arms Detachment (Chaos), Oathsworn Detachment (Imperial Knights)
Bio-Tech Nightmare: Skitarii Maniple (Skitarii), Bioblast Node formation (Tyranids)
Genestealer Cult: Combined Arms Detachment (Astra Militarum), Broodlord’s Hunting Pack formation
(Tyranids)
“A Big Mek, a Bad Mek, and a Knight walk into a bar…”: Great Waaagh! Detachment (Orks), Oathsworn
Detachment (Imperial Knights)
You can combined different types of detachments from different factions (or even the same faction) to
tell a narrative with your army. In the case of the last four examples above, “Come the Apocalypse” ally
rules mean that some elements of your army will have to set up at least 12″ away from the rest to start
the game, and will require rolls to see if they’re distracted if they come within 6″ of each other during
the game, but some careful planning will ease that penalty. In the case of the last example, it was a
joke army I took to a tournament, with a Stompa, a Morkanaut, and an Imperial Knight. (Not very
effective with objectives, but a blast to play.)
Hopefully that’s sorted out any questions you have about how to build an army in Warhammer 40,000 7th
edition!
One comment