
Ancient City Con has come and gone, and now I can actually post my “supa-sekrit” army list, along with how well it did.
In preparation for the tournament, I asked a lot of questions of the tournament organization (Jon Guzman), who was patient enough to answer all of them. I didn’t want to walk in with an army that wasn’t legal, after all. I also felt it was right to give him a bit of warning.
So, what was this list, you ask?
1850 Points Orks
Primary Detachment: Great Waaagh! Detachment
HQ: Big Mek, Mega Kustom Force Field, Mega Armor, 3 Grot Oilers
HQ: Mek
Elites: 5 Burna Boyz, 3 upgraded to Meks
Troops: 10 Grots plus Runtherd
Troops: 10 Grots plus Runtherd
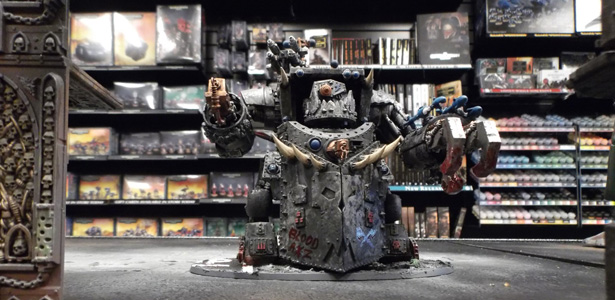
Heavy Support: Morkanaut, Grot Riggers, Extra Armor, Kustom Force Field
Lord of War: Stompa, Grot Riggers, +2 Supa Rokkits
Allied Detachment: Imperial Knights
1 Knight Errant
So what’s the back story behind this mess? Well, the out-of-game reasoning is that I’d put a lot of effort into my Knight and Morkanaut and, though it’s still going to get some extra work, my Stompa. I wanted to show off those models. The in-game story is a bit more amusing. In a nutshell: A Big Mek, a Bad Mek, and a Knight Pilot were drinking in a bar on a Rogue Trader planet, and as the drinks flowed, so did the boasts of whose giant killing death machine could destroy more. So the three of them grabbed their giant walkers and set off to show up the other. This also led to a bit of fun as I recorded the combat performance of each one to see who the victor of this bet was. (Sometimes I got behind so there aren’t exact numbers.)
The “strategy,” such as it was, was simple: Most of the Orks would pile into the Stompa, leaving one Grot mob outside (because there wasn’t room). The Stoma and Morkanaut would deploy together, the Knight would deploy at least 12″ away, and the three would rush toward the opposing army and try to panic my opponent into splitting his fire and being unable to take down any of them. In general, this was actually a pretty effective idea. I knew my one weakness would be objective grabbing, which actually kept me from placing higher. (In the end, I took fifth out of 18 participants.)
Round 1: Chaos Space Marines with Chaos Daemon Allies
In the first round, I had a pleasant match with a player I’ve played many times in the past, but hadn’t been able to play in years. He had a pretty balanced force of Chaos Space Marines backed by Chaos Daemons (led by Be’lakor). The primary mission was Kill Points, secondary was securing objectives. With more units than I had and the ability to produce more (with handy Daemon saves), he was able to get the secondary objective but not the primary. I might have snagged the secondary with a bit more luck, but needed to kill a lot more stuff to do that.
The Stompa blasted a pair of Obliterators right off the bat, destroyed a Rhino, a handful of Space Marines, a lot of Horrors (but not quite enough), a Flamer, and a Screamer. The Morkanaut managed to take out a Rhino and its passengers, as well as a Screamer or two. The Knight, however, went on a bit of a rampage, tearing through multiple Chaos Space Marine Squads, squaring off with a Soul Grinder in combat and winning, and stomping all over a Havoc squad (while the Soul Grinder deftly dodged the Stomp). The Knight Pilot was celebrating an early lead.
Round 2: Orks
My second match was against another Ork player. He brought a Stompa of his own, with a Big Mek inside with a Kustom Force Field. He also had three large mobs of Boyz with Nobz equipped with power klaws, a Warboss with power klaw, five Flash Gitz, and fifteen Lootas. The primary mission was capturing objectives (one in the center of the table, one in the middle of each quarter), the secondary mission was to get more units into your opponent’s deployment zone than he got into yours. One of my Grot units managed to get the Tellyporta’s Deep Strike rule, which would allow them to Deep Strike onto an objective.
The mission also allowed us to give a unit one of a number of special rules, so the Lootas (and my Stompa) had Tank Hunters. He got the first turn and unloaded on my Stompa and Morkanaut. The Morkanaut made an impressive number of saves against the Lootas, living to fight one more turn. The Stompa took a bit of damage, but nothing to get too scared over. Its return volley knocked off nearly half of the opposing Stompa’s hull points as it fired off every weapon, but was sadly just out of charge distance (the terrain was quite dense). The Knight went forward, blasted a couple of the Lootas, and then assaulted a large mob of Orks on the flank. That combat would go on multiple turns until finally the Nob – sole survivor of all kinds of Strength D attacks and Stomps – succumbed, leaving the Knight to trudge over and tear through the Lootas. My opponent’s Stompa moved up, shot at mine, and then charged it, leading to an epic struggle that my Stompa managed to win, tearing his to pieces and killing the Big Mek – who was his Warlord – in the process. The Morkanaut, sadly, was blasted to scrap by the Lootas’ second volley while the Knight was tied up. With my opponent’s Stompa dealt with, he didn’t have much to deal with my Stompa, who was getting repaired quite well by the small army of Meks inside. His Warboss tried to take on the Stompa and died. The Stompa then turned on the Flash Gitz, tearing them apart, and finally the Stompa and Knight mopped up the remaining Ork Boyz.
While the Knight did a lot of kills, the Stompa clearly came out on top. The Morkanaut, of course, had to put itself back together for the next round, as the Bad Mek endured taunting from the other pilots.
Round 3: Blood Angels
The final match had three objectives, with one in the middle being a Relic. Primary mission was objectives, second was Victory Points with control of the Relic being worth 250. My opponent’s entire army was in Drop Pods, with multiple Sternguard squads armed with melta and plasma guns, an Honor Guard with melta guns (and attached Chaplain), two Death Company Dreadnoughts, a Death Company, and a Tactical Squad. He won the roll and opted to let me deploy and go first, effectively wasting a turn for me as I had nothing to shoot. He then dropped in all of his gun squads right in front of my Stompa and unloaded on it, but couldn’t bring it down.
What followed was a complete mess. The walkers all unloaded on the Space Marines, killing what they could between all the Drop Pods, trees, and buildings. Assaults led to more Marines dying, with some of the squads running away rather than deal with the vehicles. The Chaplain led a suicide charge on the Stompa, but couldn’t hurt it; still, he locked it up in combat for multiple turns, leaving it unable to shoot at the other Marines. A Dreadnought moved in to assault the Stompa and was wrecked for its hubris; the Chaplain eventually was also squashed with a potent Stomp. The Knight spotted the Death Company and the other Dreadnought heading for the Relic and launched an assault, tearing through Death Company slowly. As the Dreadnought tried to make off with the Relic, the Knight stomped forward and squashed it. Unfortunately, the remainders of another squad were nearby, able to grab it as the Knight was tied up. Even with bad lines of fire and luckily cover saves, my Knight and Stompa both took out a number of Blood Angels (with the Morkanaut getting in a small number of kills). The Stompa added a Dreadnought and Chaplain to its haul; the Knight had a Dreadnought and half the Death Company. My opponent got the primary mission with a Drop Pod holding one objective and two Marines carrying the Relic; with only one Grot squad killed, I easily had the secondary (as well as many tertiary objectives).
Victor of the Bet: Stompa
The second round really determined the victor of the bet in terms of sheer damage caused. The Knight did an impressive amount, but the Stompa took out another Stompa and killed two Warlords. The Morkanaut, meanwhile, didn’t really do much. The Stompa also soaked up a lot of hits and attention, and the crew inside tirelessly kept repairing it. Only in the final game did it end the game with any damage left over, five HP knocked off, which might have been less if I’d remembered It Will Not Die each turn.
Conclusion
The army I played was mostly for fun, but was actually pretty effective, and could have won the last match and grabbed the secondary points in the first match with a little more tactical thinking and less “Stomp the other guy!”
My primary personal objectives were to have fun and show off the models I’d worked on, both of those being major successes. I enjoyed the compliments from people looking over the big models. Ironically, most of the infantry didn’t even get onto the board during the games, and I’d spent much of the week prior getting them assembled and painted.
I’ll have pictures up later of the models, as I find a location to take some pictures. For now, you can already see the making of my Knight and Morkanaut on this very website.